Life moves fast…my little boy turned one not so long ago. I posted photos on facebook, for friends and family, but barely had the time to share the birthday party on my blog. There were so many cute details we prepared ourselves; I’m quite proud of how it all turned out, and the timing was perfect. He turned one on Easter Sunday, so we hosted a Brunch to celebrate both occasions.
The projects included the following…all of which the hubby and I tackled on our own, and somewhat succeeded!
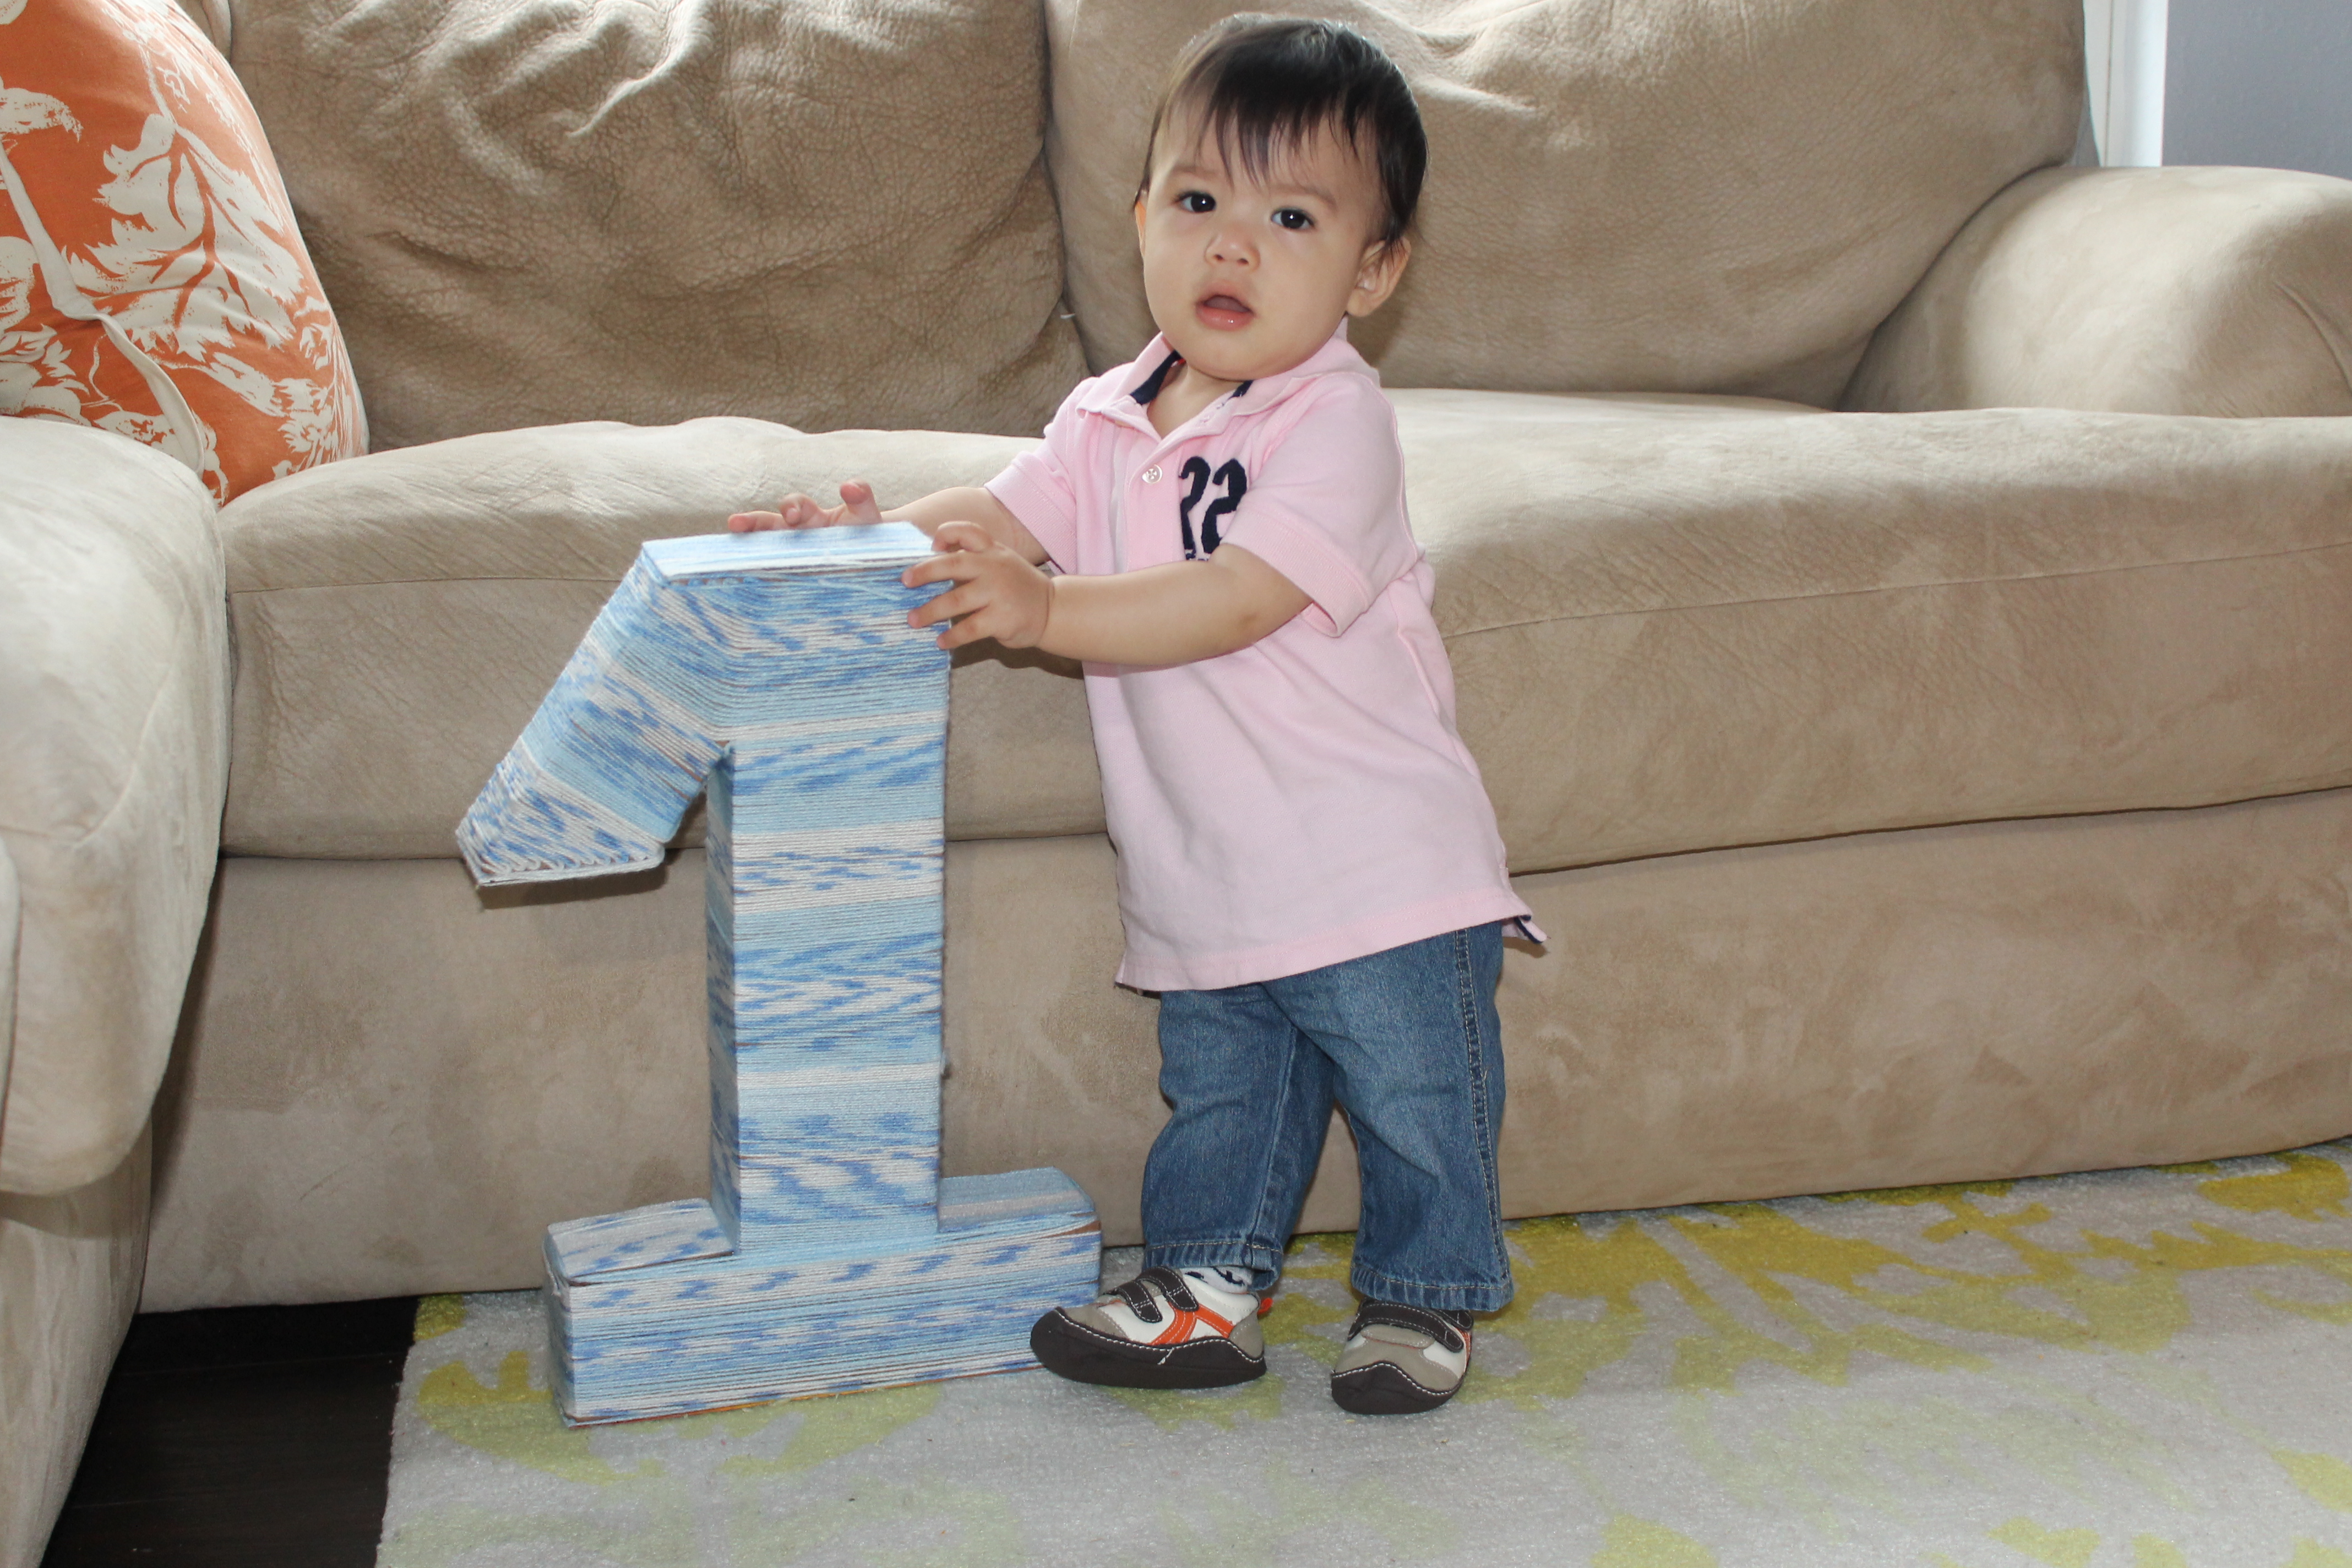
DIY Numero Uno
The yarn-wrapped number one shown above was a joint effort by my husband and I. My husband carved it out of spare carton boxes, hot glued them to stay together, then I painstakingly wrapped it in an ombre yarn in blue, to give it this nice textured effect. The yarn-wrapping took several days to complete, as some of the areas had to be done on smaller scraps of carton, then glued back onto the number one, since it was so tricky to really wrap yarn around the entire number.
Project Summary: Tools Needed: Hot Glue Gun and 3 – 4 Glue Sticks (for building number), One Ball of Yarn, One Elmer Glue Stick (for patching up scraps of yarn-wrapped carton) Cost: $5 – $10 (depending on which craft tools you already have); time spent – 4 days
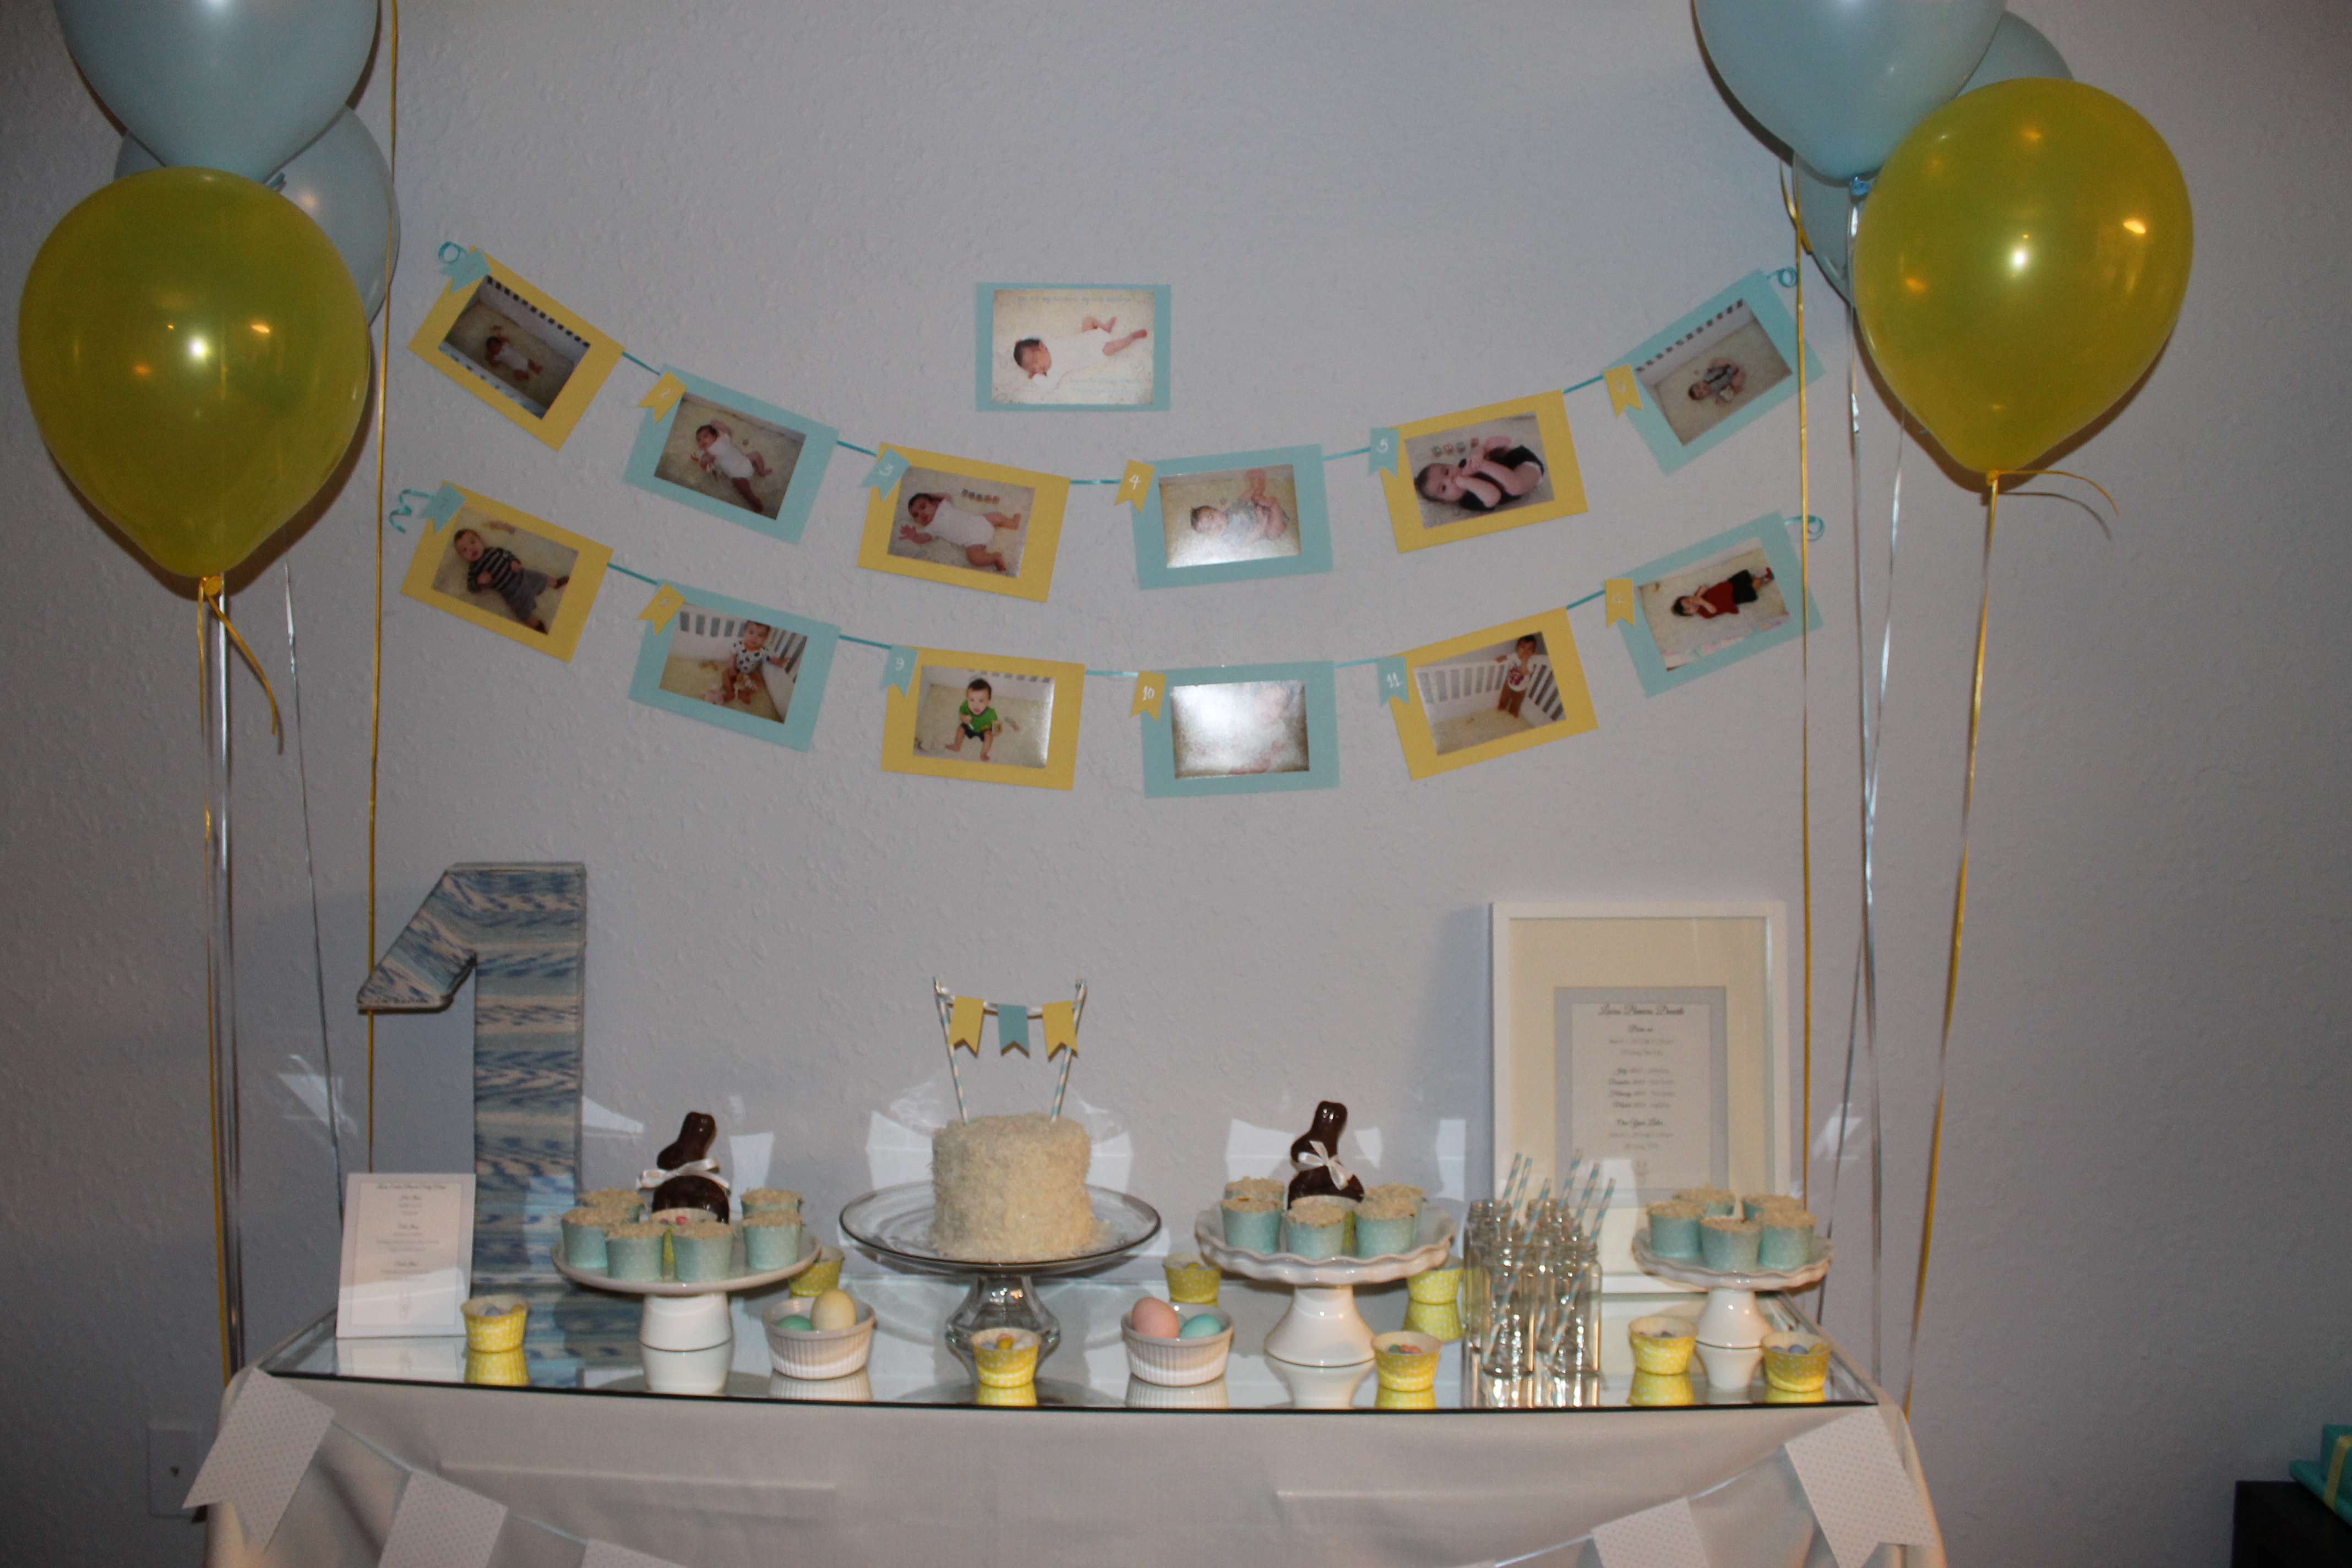
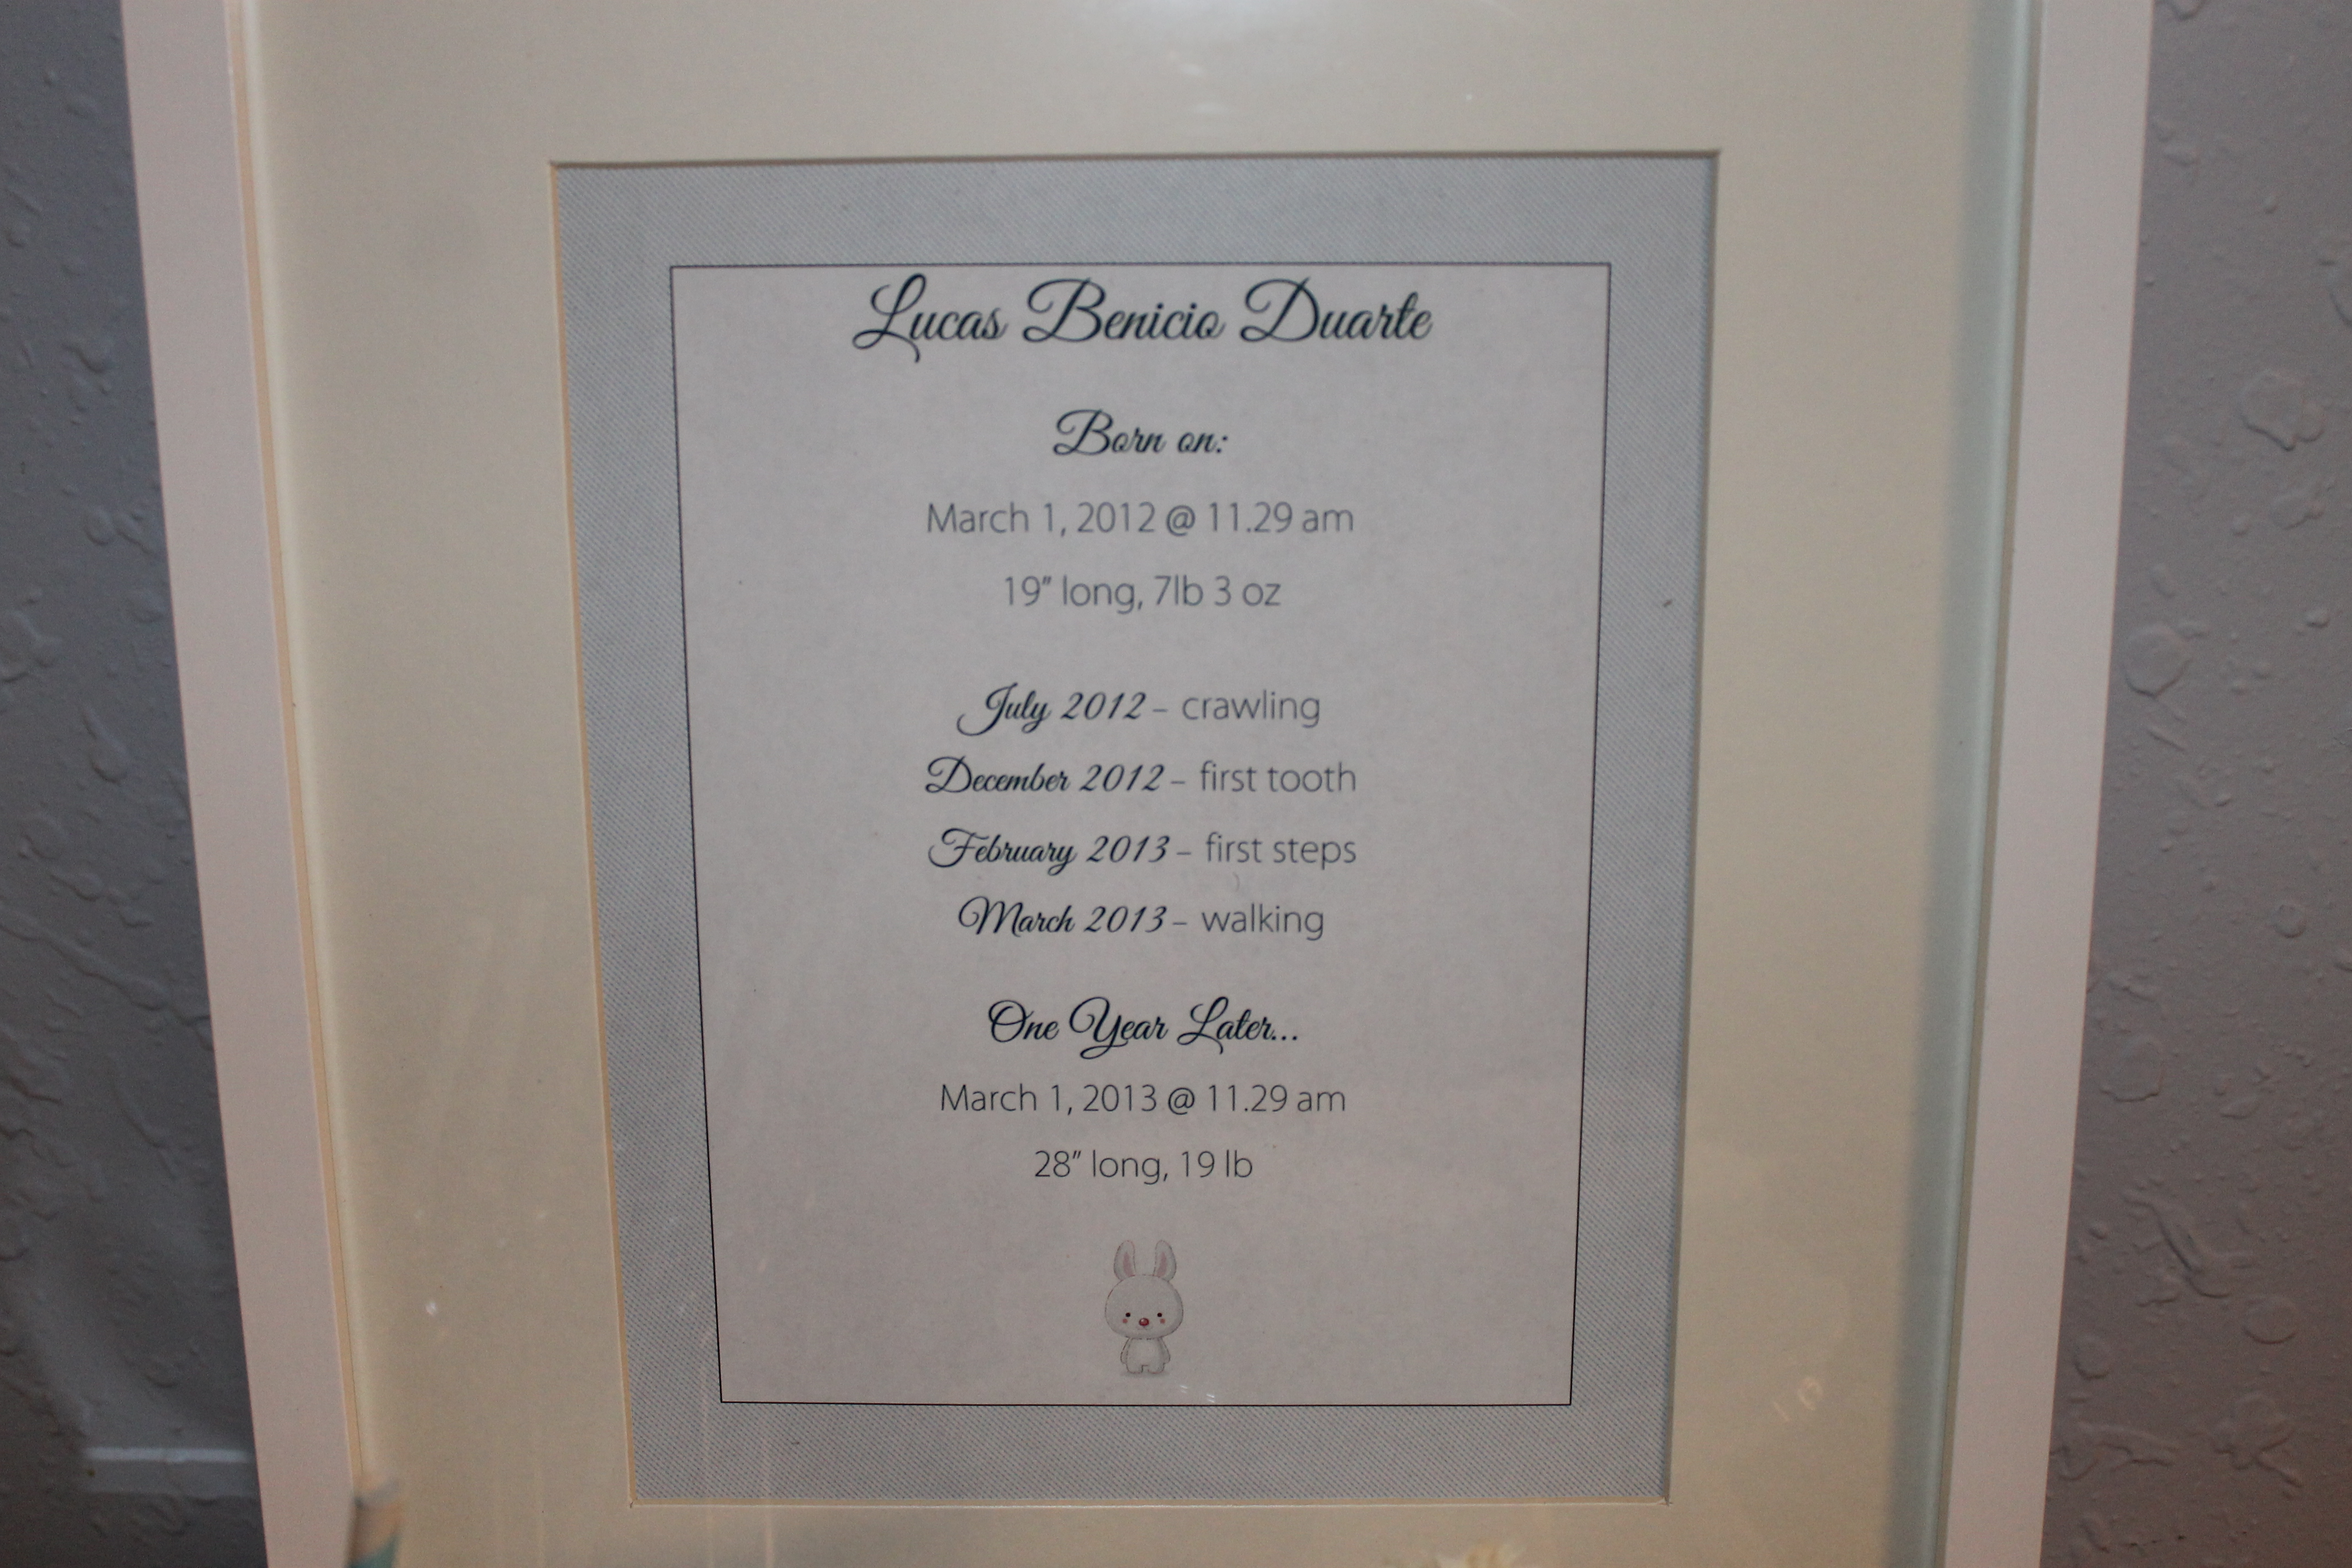
Twelve Month Photo Banner
This was such a cute project, and I hung it up in his nursery after the party, where it remains today. This was an effort, because every month I tried to remember to take the similar picture of him in his crib, inspired by the newborn photo our photographer took of him when he was less than two weeks old. I bought card stock in blue and yellow, to match the theme of the party, and mounted each photo onto card stock, alternating the colors, then punched out mini banners to use as labels for each month. The tricky part was adhering them to the ribbon with double-sided tape, evenly spaced, and also it was a two-person job (three, if you count my husband guiding us to how it looked) to get it up on the wall. It’s a good idea to press firmly on the sticky tape behind each photo to the wall so it doesn’t rely only on the tape at the ends, because trust me, it will start to fall off easily and quickly…
Project Summary: Tools Needed: Card Stock, Double Sided Tape, Craft Punch (or your imagination to make label badges), ribbon Cost: $5 – $10 (depending on which craft tools you already have); time spent – 2 hours
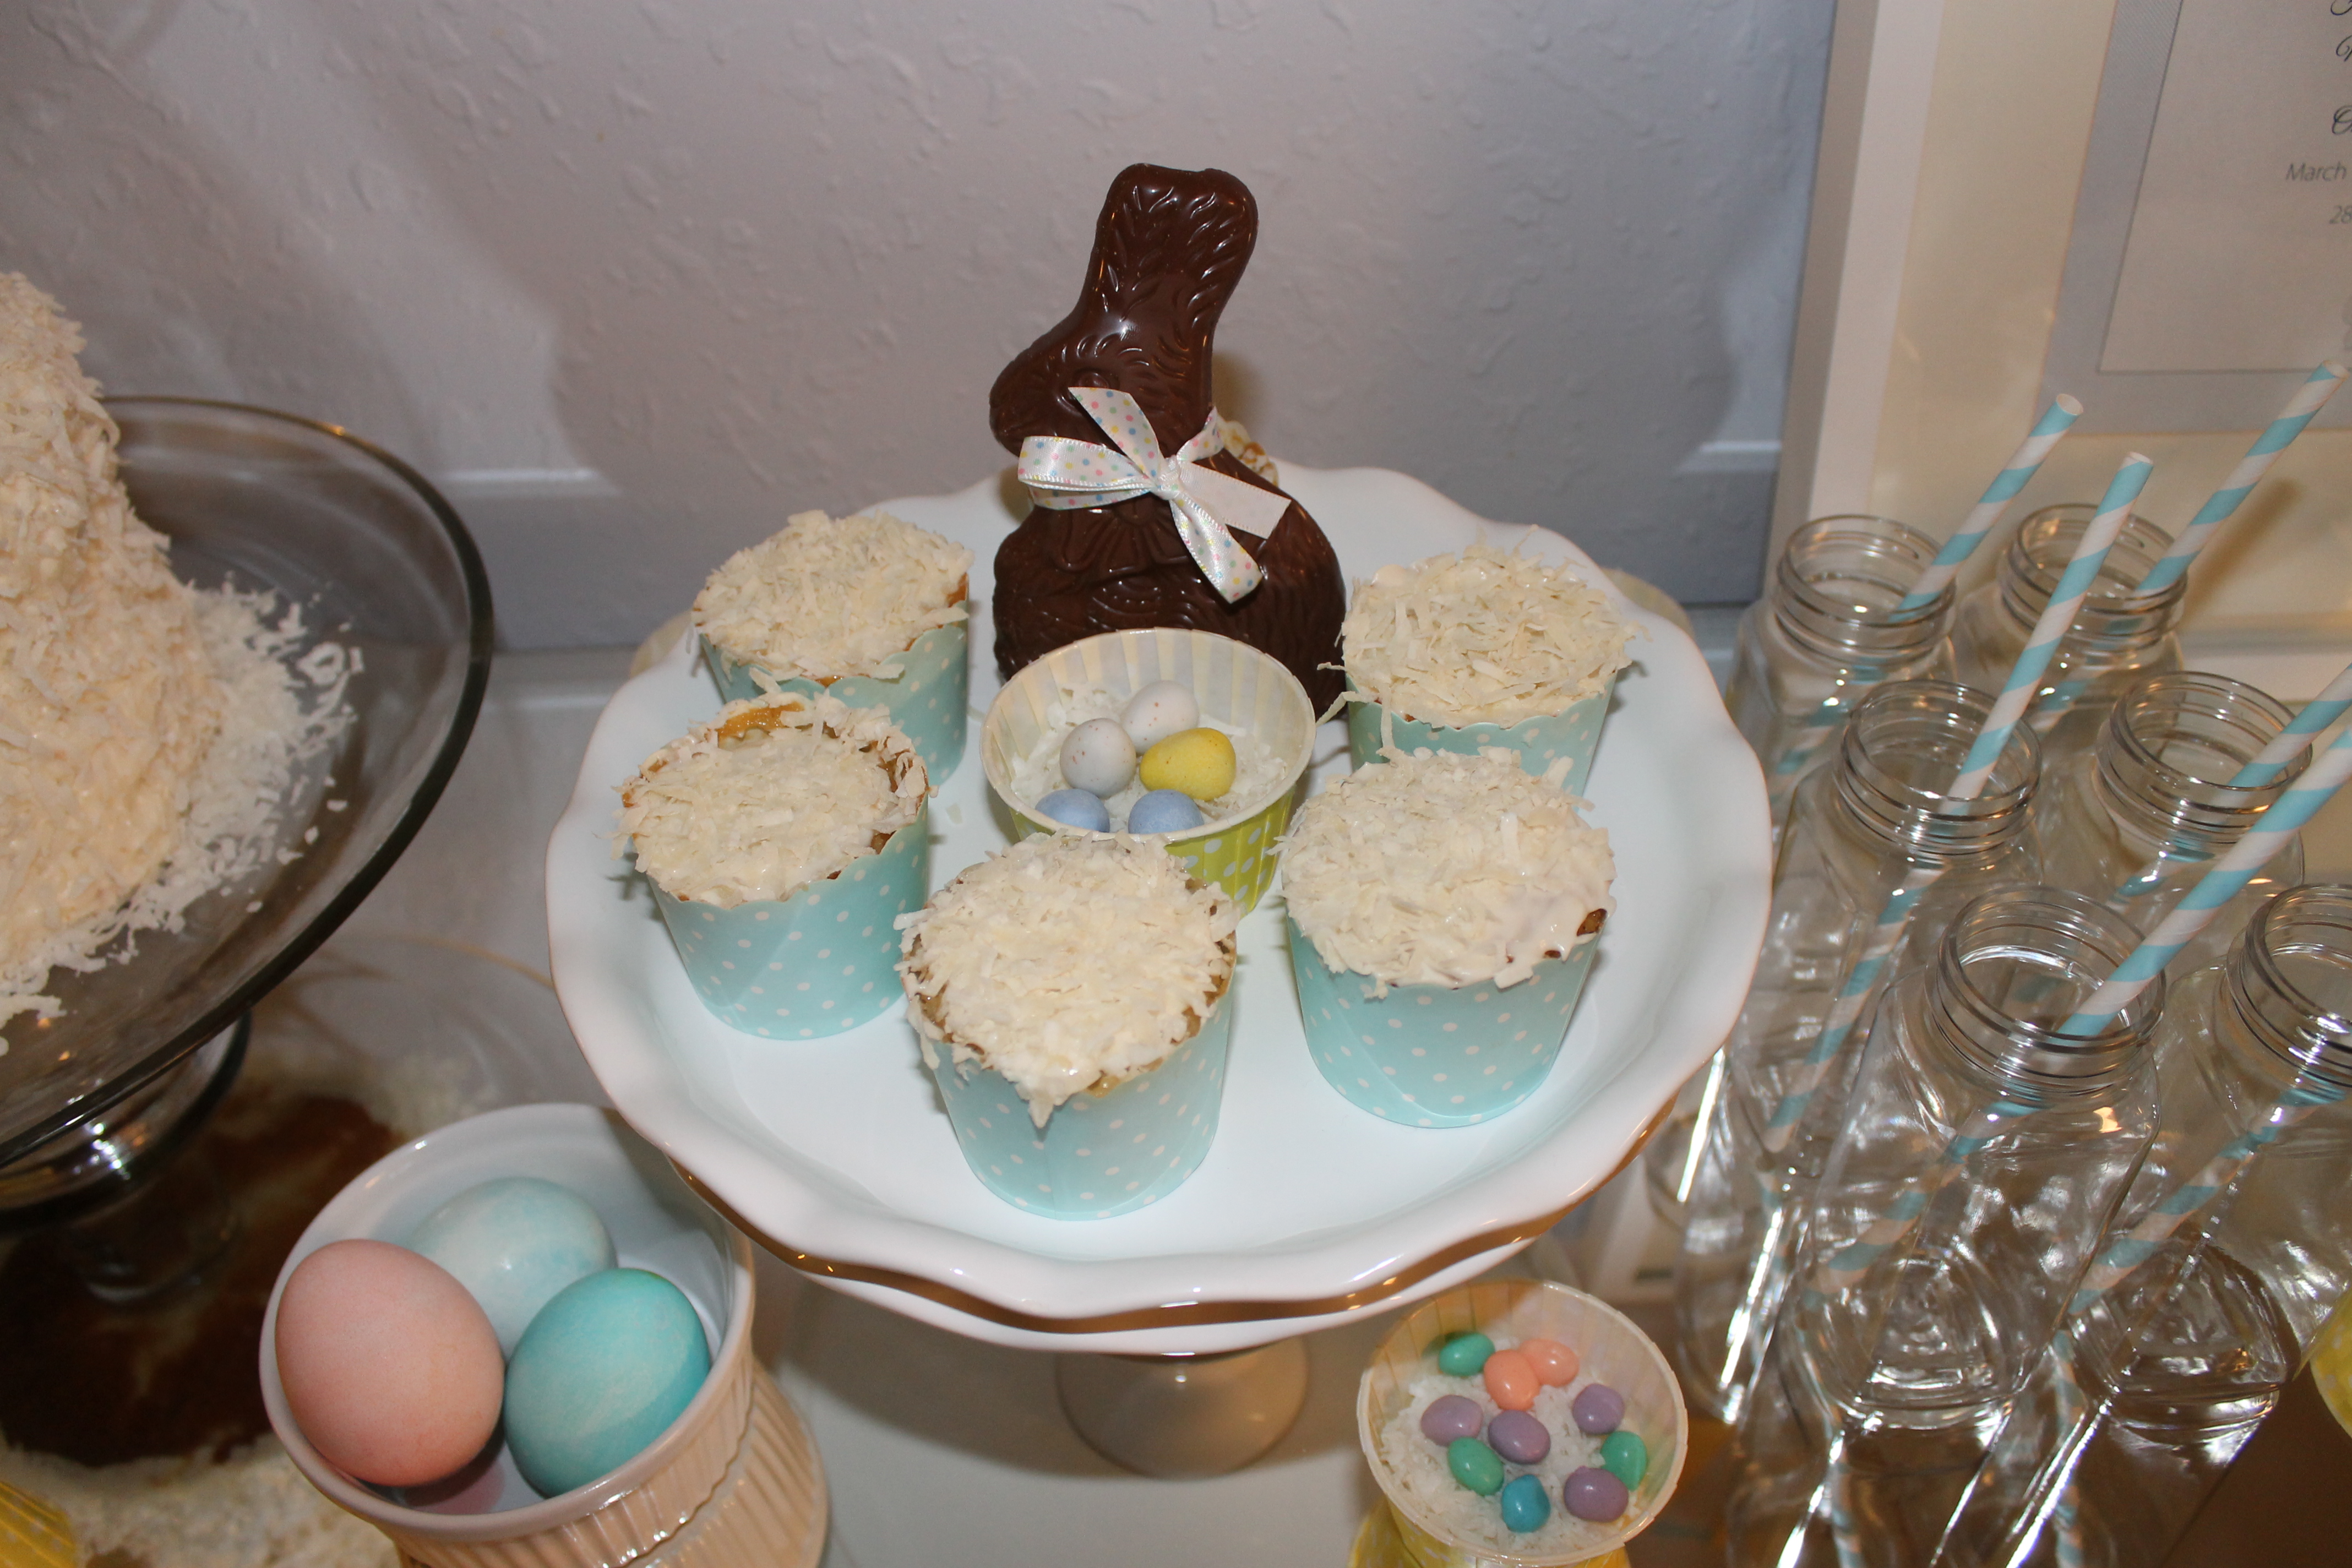
*Note: I used the same craft punch and ribbon to make the mini banners for the cake.
Custom Printable Set
This took me awhile to figure out. I didn’t quite know what to create, that could be fitting for both Easter and a first birthday party for a little boy. After many hours spent on pinterest and party blogs, I settled on keeping it simple and fresh, but adding a bit of fun to the theme with this cute little bunny image I found as a free clip art file on the web. I added a fancy script font for the titles, and a nice seersucker blue diagonal pinstripe as the background for my custom printable collection. It took a lot of patience to center things just right, and to make the little tent holders in the back, but I felt it was all worth it and was a nice finishing touch for the party.
Project Summary: Tools Needed: Creativity, Double Sided Tape and Stiff Paper or Card Stock to use as tent holders in the back Cost: less than $5; time spent – 4 hours {I could have created invitations too, but used this cheeky bunny e-card from Paperless Post instead}
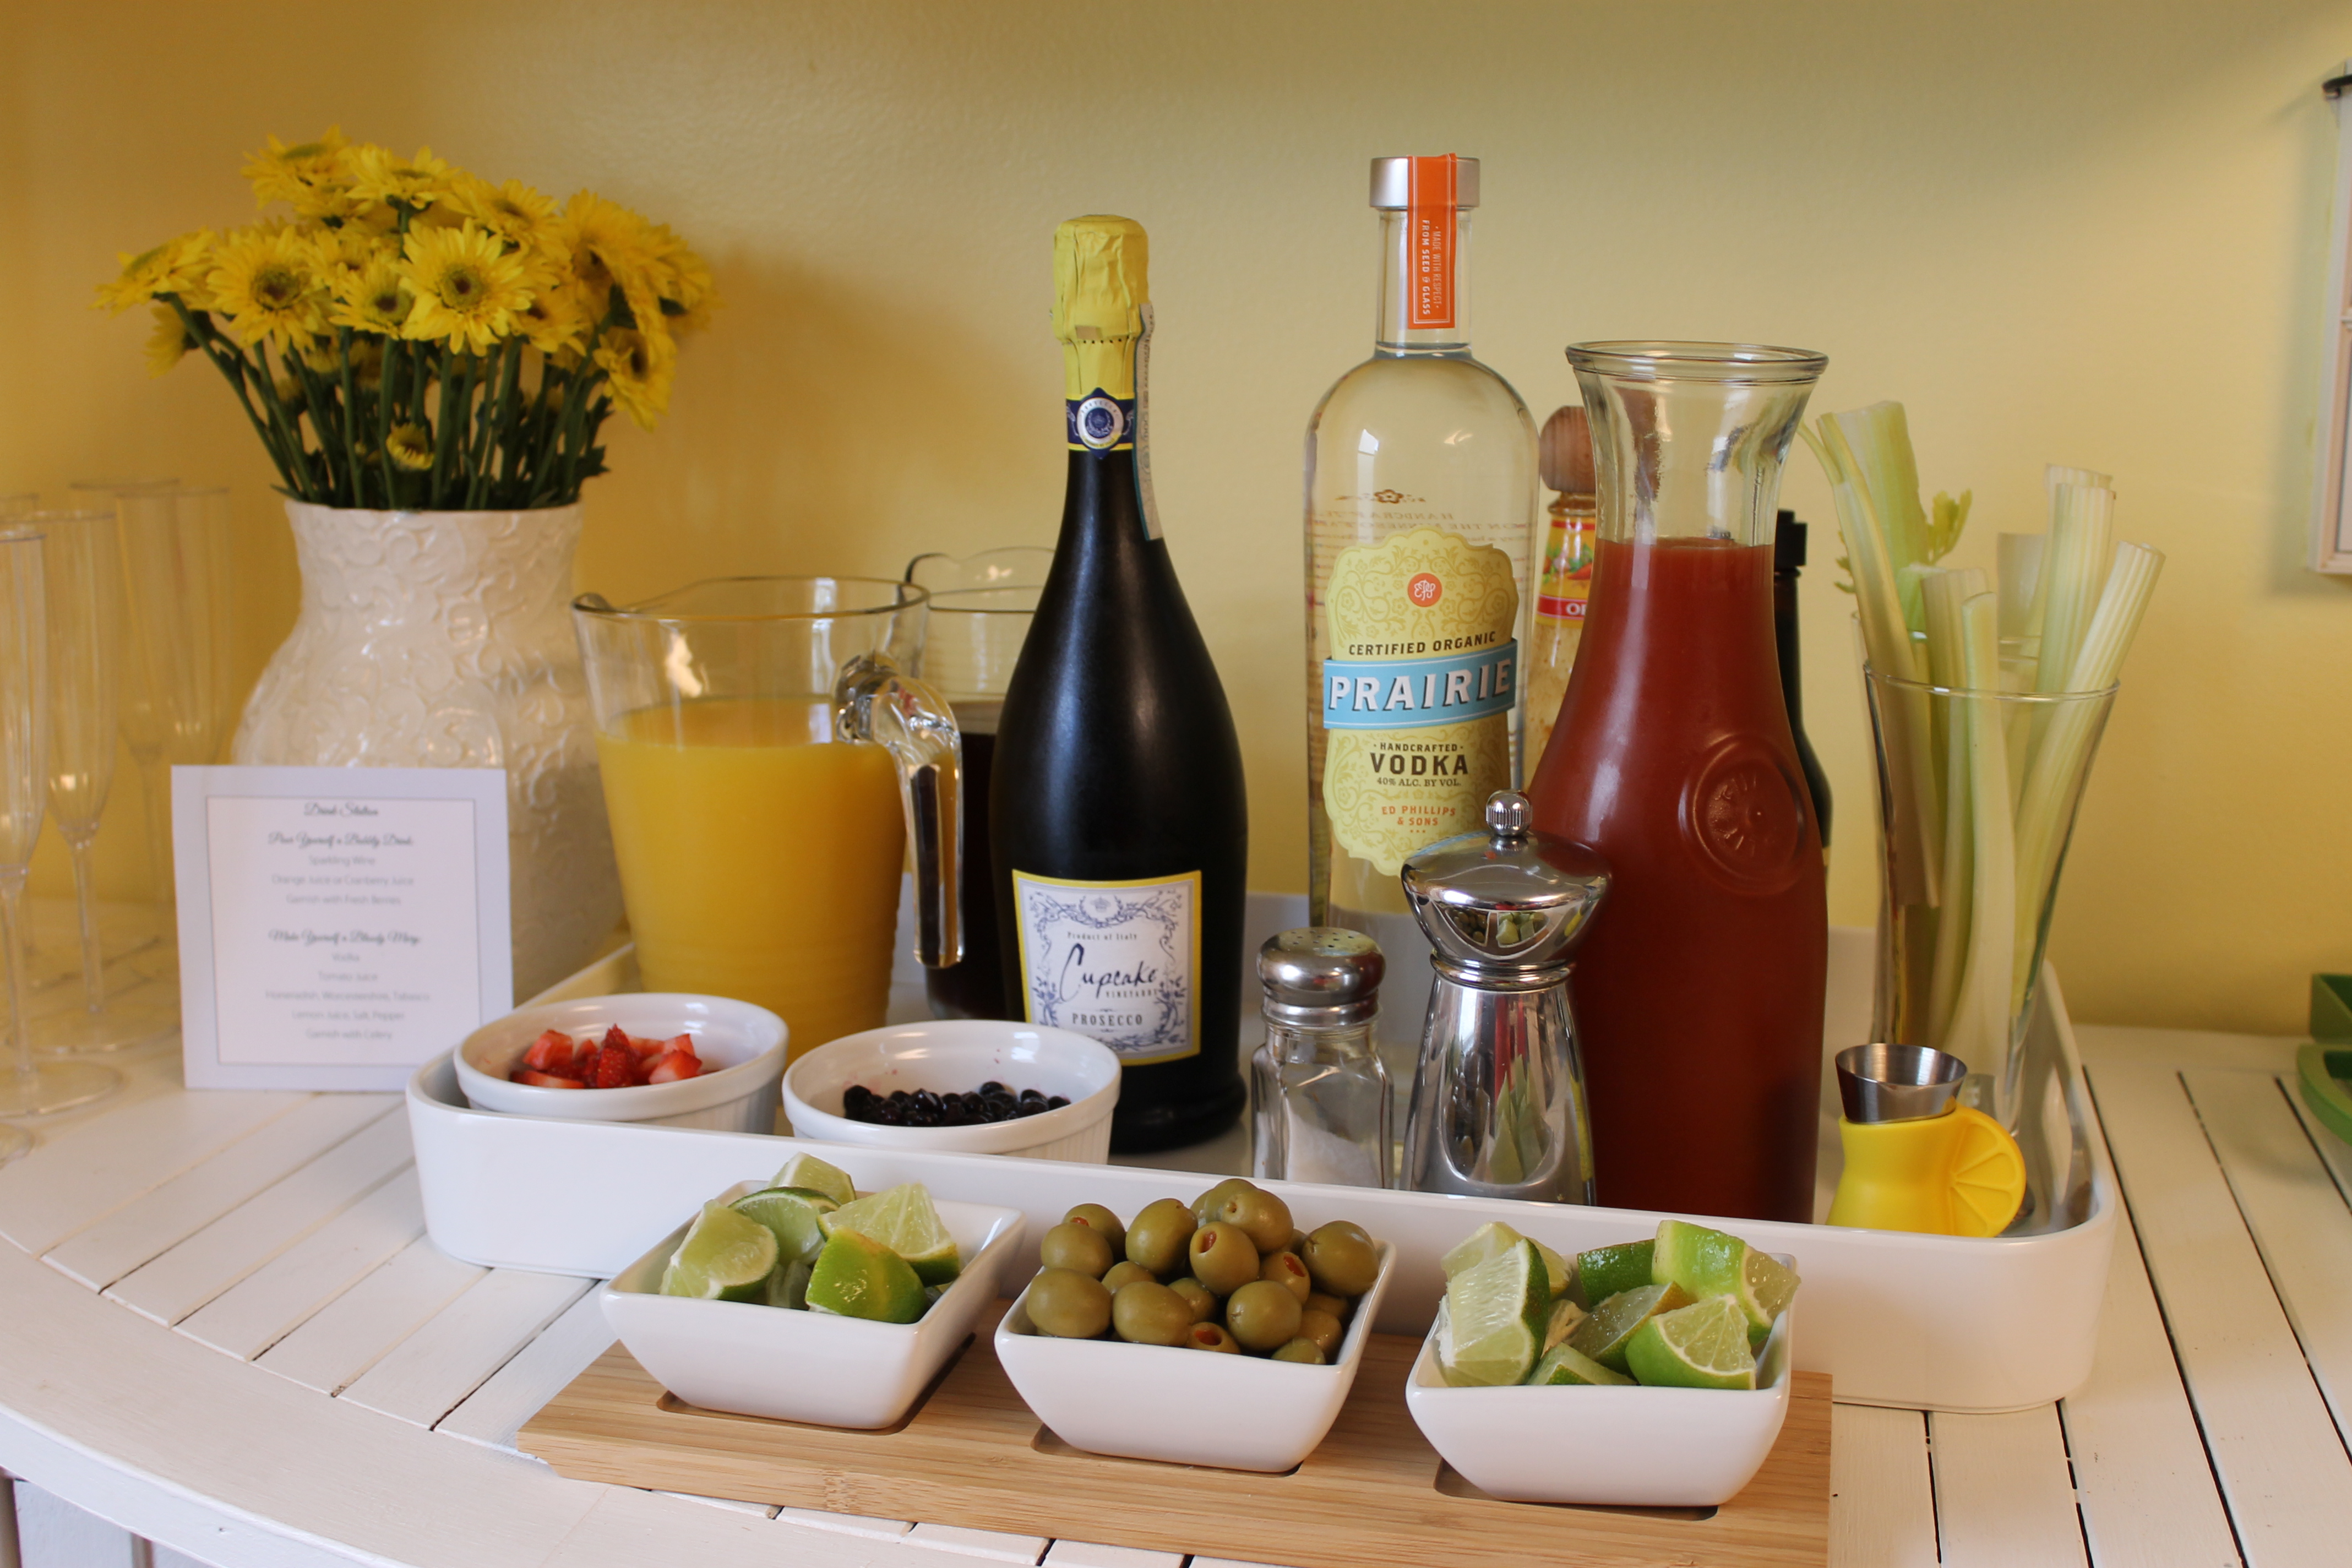
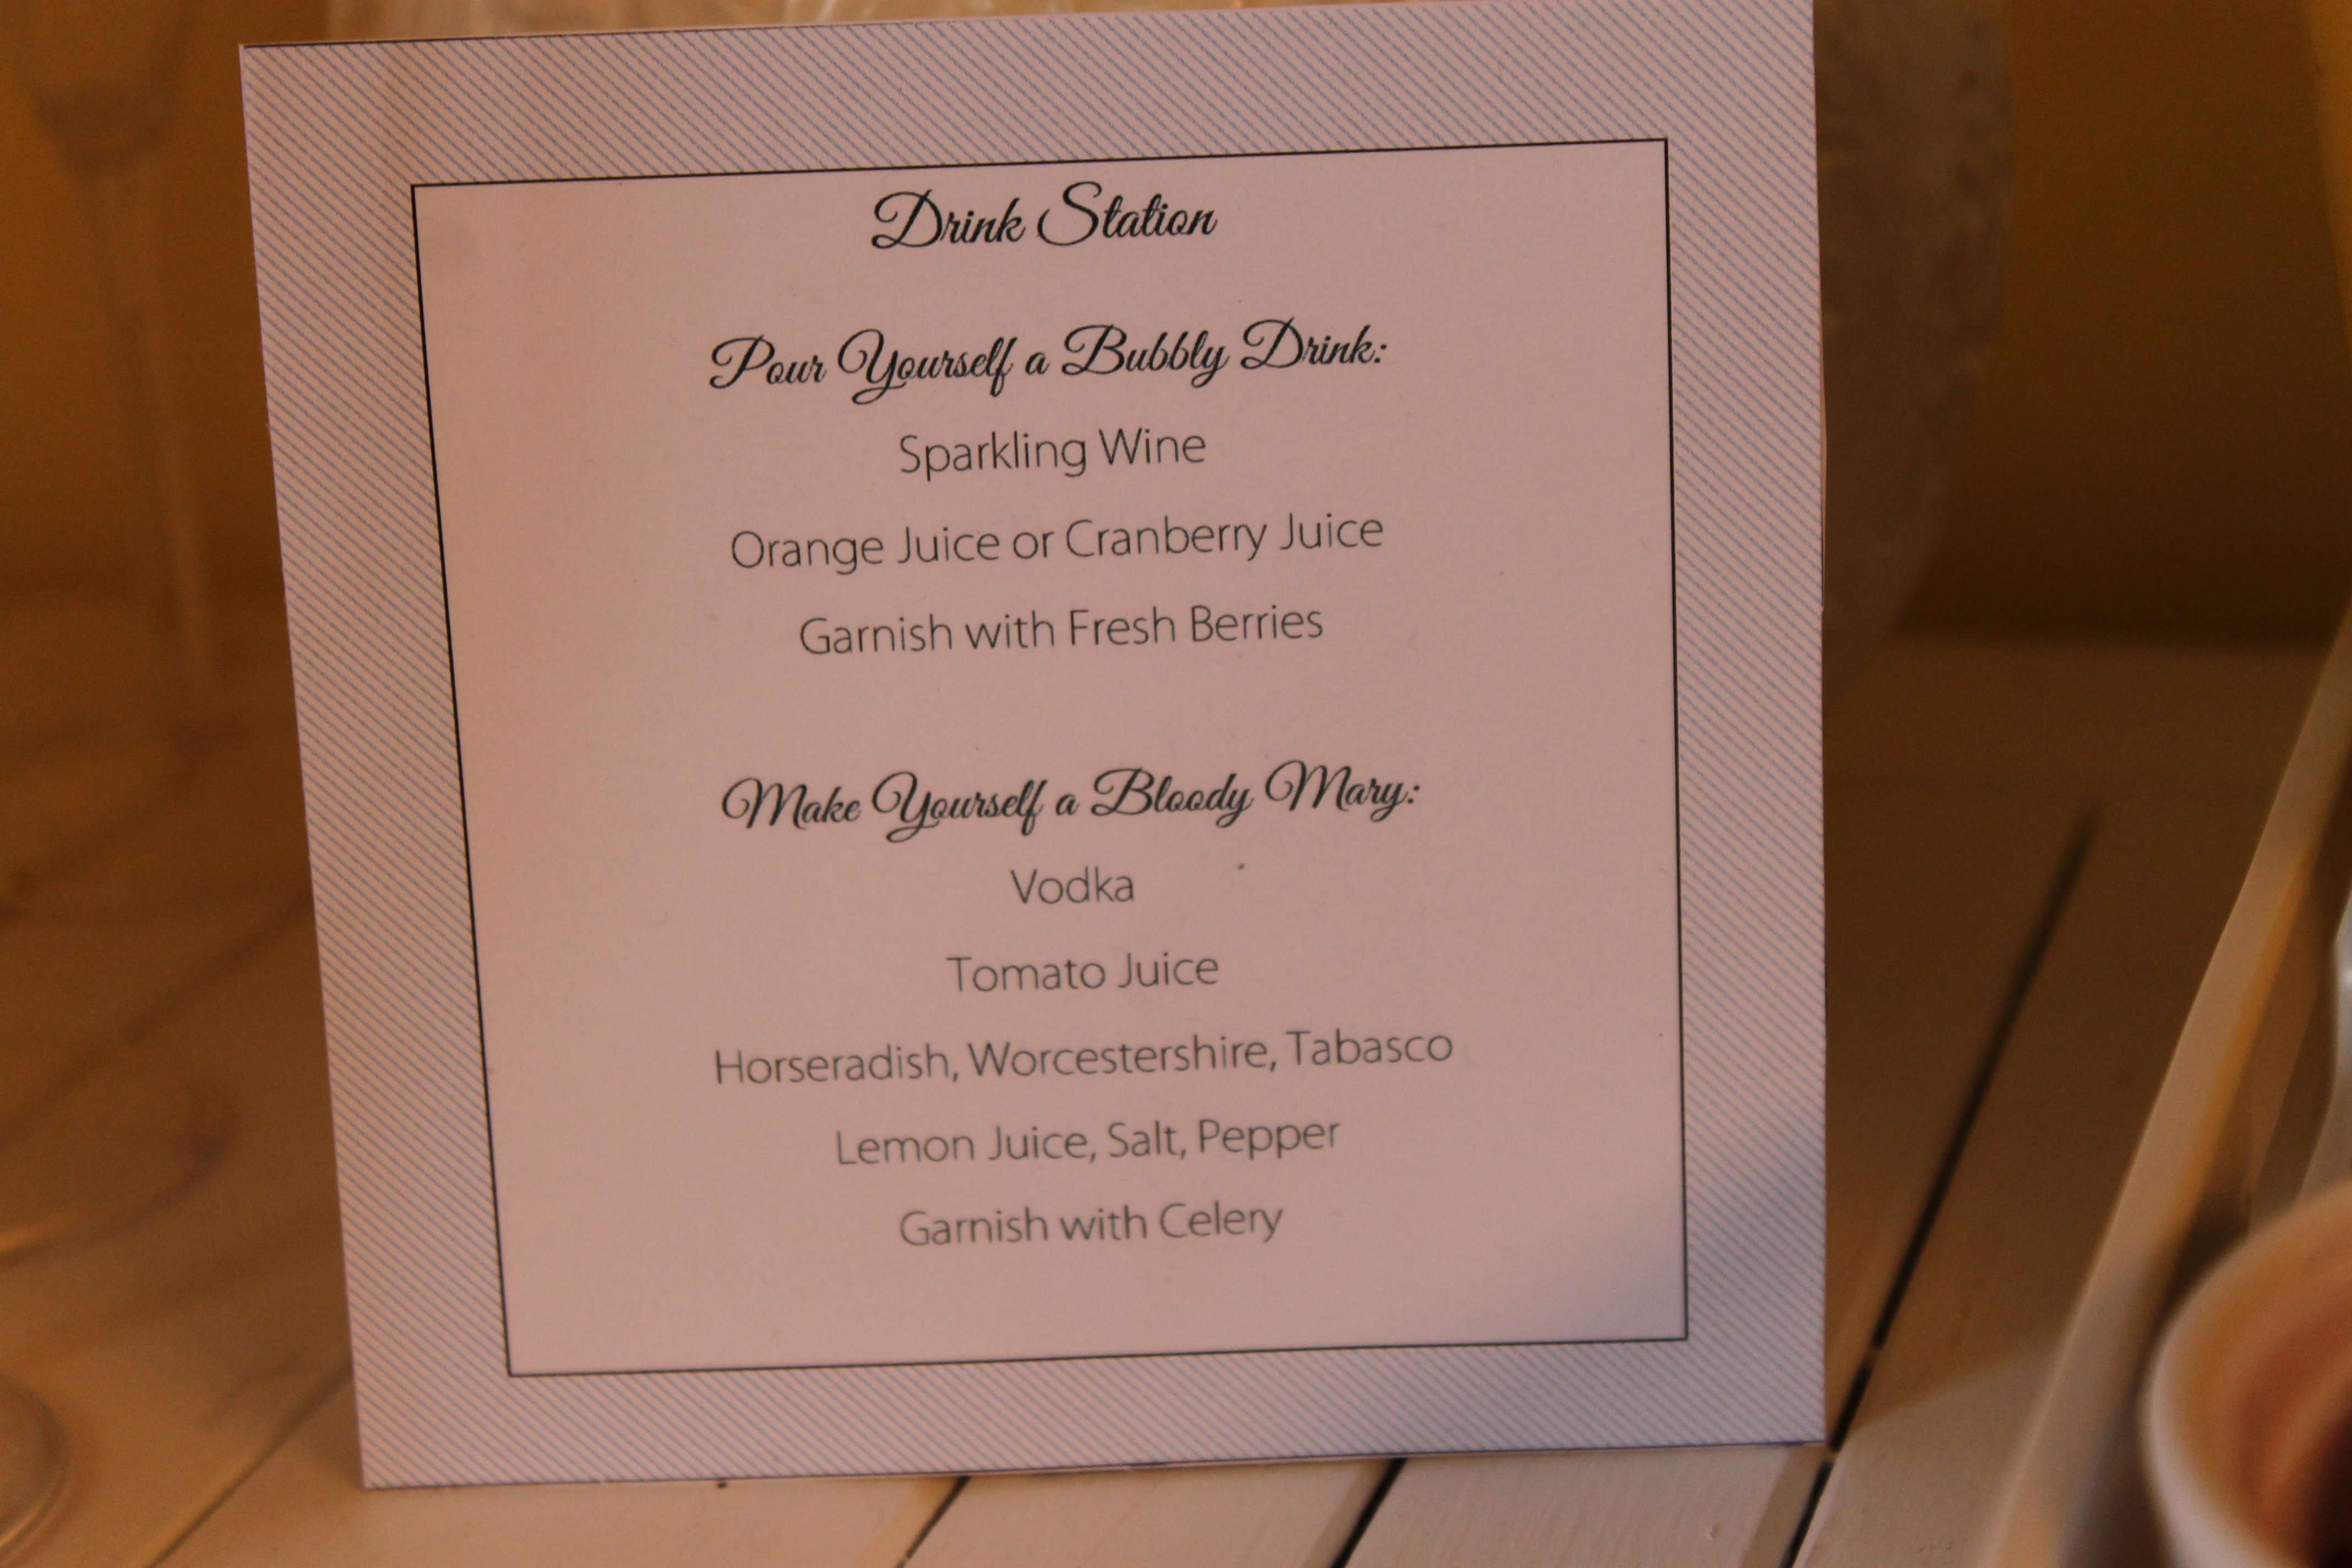
Brunch Drink Station
This one was easy, and a nice treat for the adults. I mean, how can you have brunch, without a Mimosa or Bloody Mary? The key was presentation. We emptied out the juices into pitchers and served up fresh fruit and condiments to garnish the drinks in small plates. Everything looked nice and neat, when set on a tray. We set out the glasses too, for a self-serve bar. Everyone loved this!!
Project Summary: Tools Needed: Sparkling Wine, Orange Juice, Cranberry Juice, Fresh Berries, Vodka, V8, Olives, Lemon, Serving Glasses, Tray and dishes Cost: $15 – $20 (depending on the quality of what you buy); time spent – 30 minutes

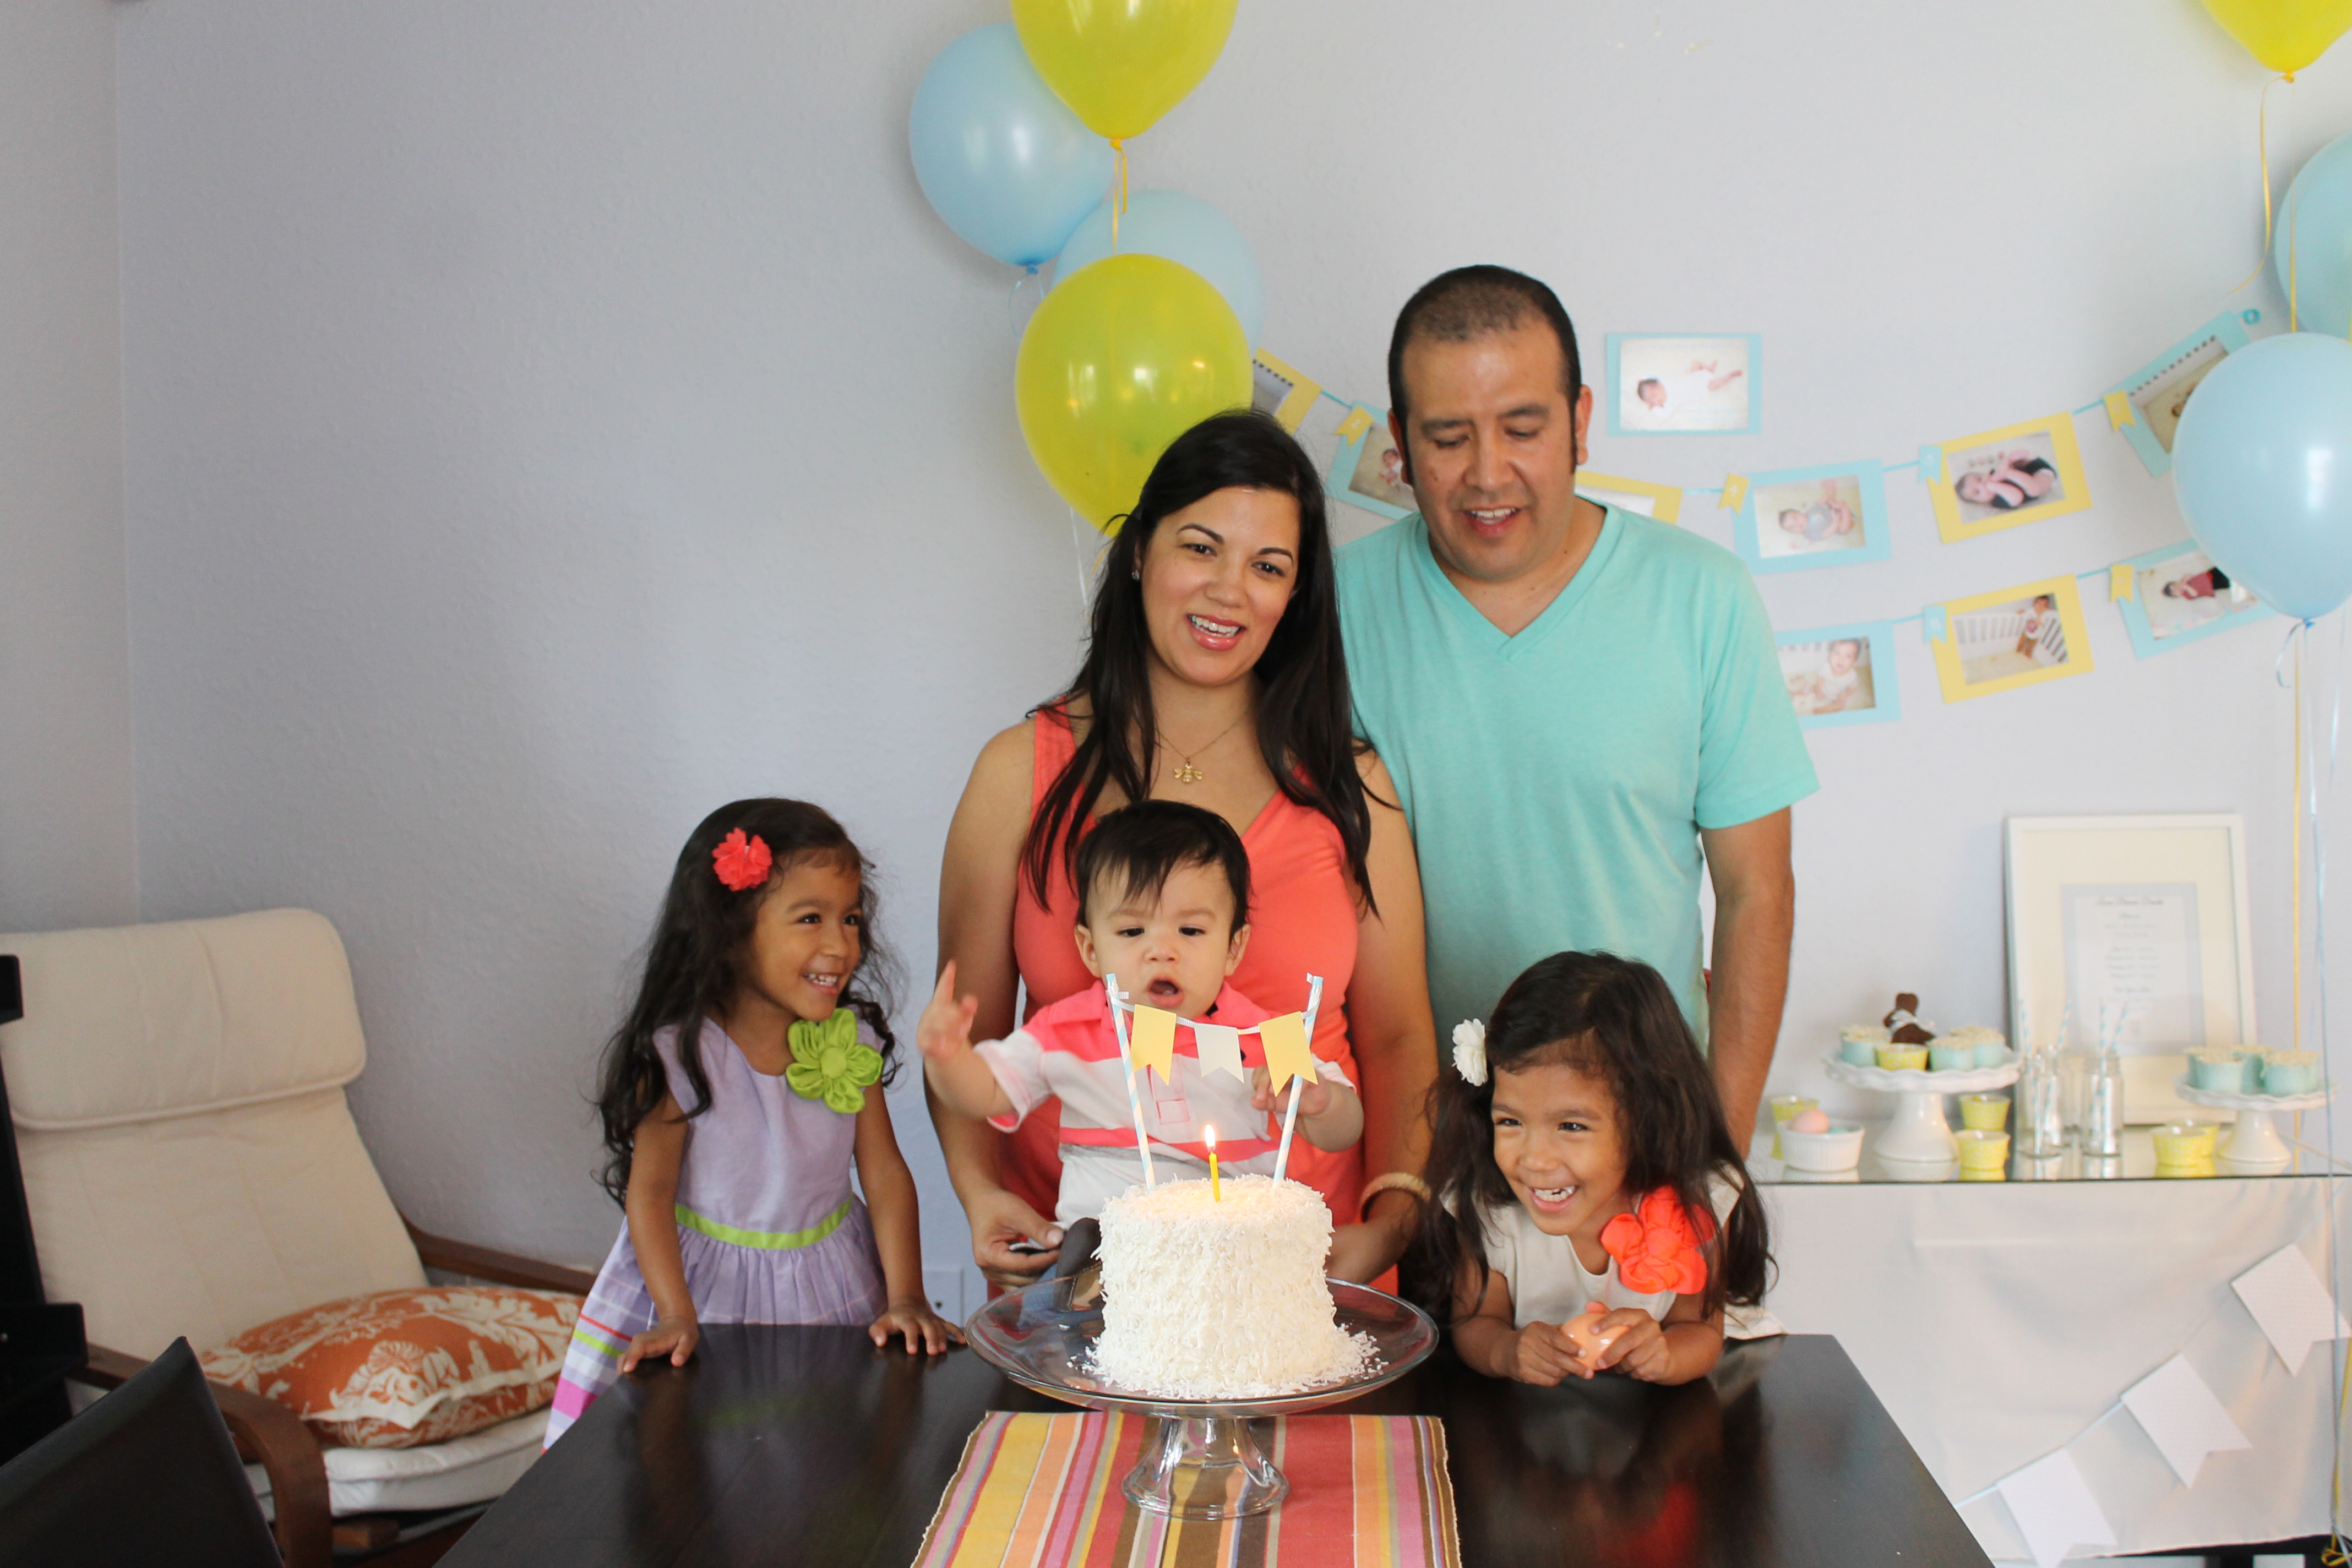
All in all, it was a fun party and all the work put into planning and decorating was well worth it. I’m happy the birthday boy enjoyed all the decor and fuss as much as I did, and not to mention the girls’ joy in helping him celebrate too!
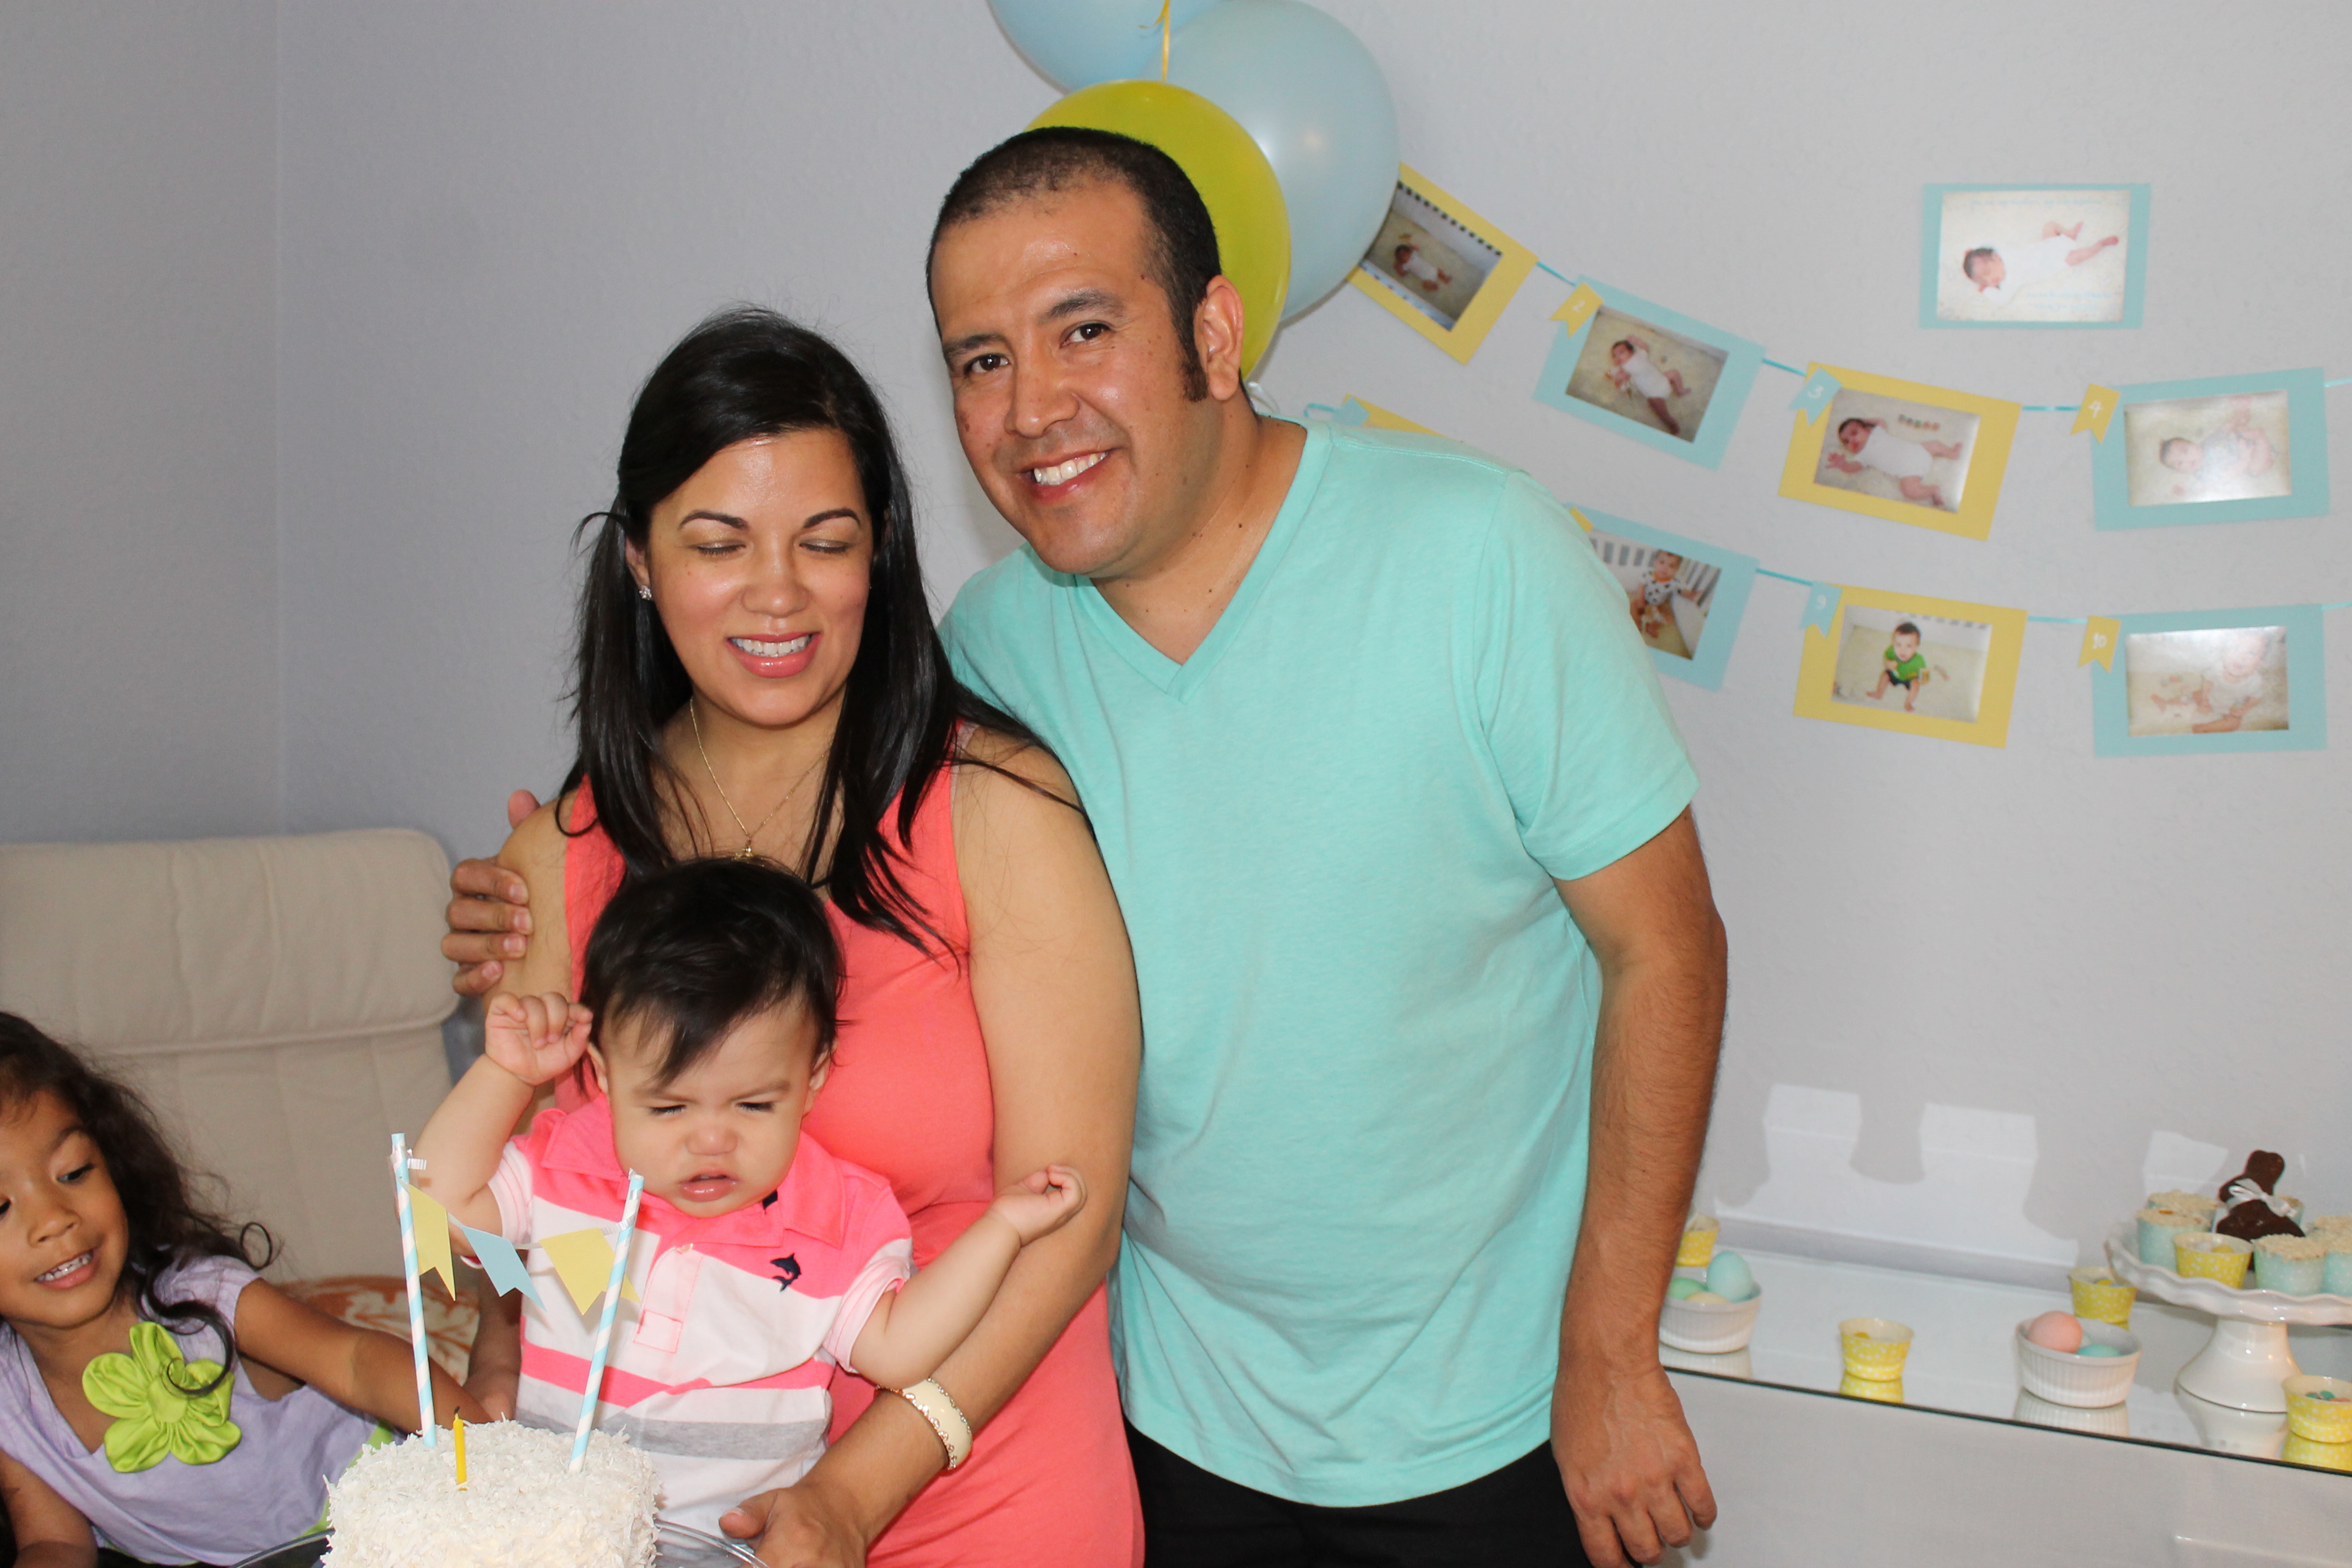
I leave you with a photo of my squirming baby boy, squirmy and all, as a reaction to when we tried to get his little hands on his cake…
I hope you enjoyed this post, and that it was fun as well as informative. Thank you all for following my blog.
{Have the sweetest day}
xoxo
Haydee
